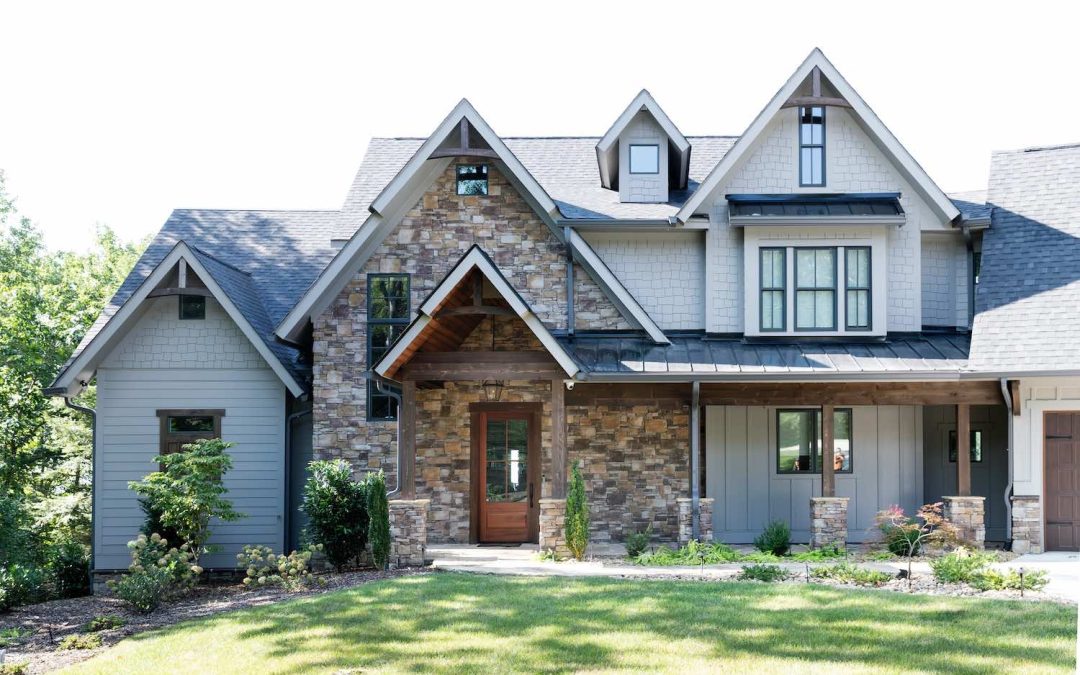
When you set out to transform a space with stone, whether it’s the sweeping exterior of a new home or an intimate interior fireplace or accent wall, your focus is naturally on the beautiful Horizon Stone veneer you’ve chosen. The stone is the star, but here’s the truth: the color of your mortar is what truly defines the personality of your entire project.
Mortar is not just a filler; it’s the backdrop that frames every stone. Since it can account for up to 20% of the visible wall surface, this seemingly minor detail is actually the most influential design choice you’ll make. Your mortar choice can define the character of your project, turning a traditional facade into a modern one or a rustic fireplace into an elegant one.
“Think of Mortar As A Design Material, Not an Afterthought.”
Tip #1: Understand Mortar Types and Strengths
Mortar isn’t just about color; it’s about the safety and longevity of your project. The most critical structural rule in masonry is that the mortar should always be softer than the stone or brick it holds. If the wall is under stress (like settling or ground movement), the mortar should crack before the stone does, making repairs much easier.
Mortars are classified by compressive strength, moving from softest (Type O) to hardest (Type M):
| Mortar Type | Key Use & Strength | Ideal Application |
| Type O | Low strength; highly flexible. | Interior Use Only (e.g., non-load-bearing fireplaces, purely aesthetic accent walls). Great for soft, historic stones. |
| Type N | Medium strength; general-purpose. | The best starting point for above-grade work (e.g., exterior veneers, standard walls, chimneys). |
| Type S | Medium-high strength; good tensile bond. | Foundations, retaining walls, or high-wind/seismic areas where resistance to side pressure is required. |
| Type M | High strength; most rigid. | Heavy loads or specific engineering needs (e.g., below-grade foundations). Generally, it is too hard for most stone veneers. |
")
Tip #2: Match Mortar to Stone and Project Needs
Choosing the right mortar type is all about balance. It all comes down to compressive strength, the amount of pressure the mortar can withstand, and where the stone is being installed.
Answer these three key questions about your project:
- Is this project above or below ground?
- Are you installing veneer on a structural wall or a decorative surface?
- What is the density of the stone for your project?
Here is how to match the mortar’s strength to your project’s needs:
- Above-Grade Veneer (Exterior Walls and Chimneys): For most standard above-ground applications, Type N is the gold standard. It offers the ideal balance of strength and flexibility, making it durable enough for outdoor use without being so rigid as to damage your stone veneer. This is your safe, general-purpose choice.
- Below-Grade Foundations and Retaining Walls: When a wall is holding back earth, facing high lateral loads, or serving as a foundation, you need more muscle. For these projects, you’ll step up to Type S or Type M. These stronger mortars provide the compressive strength required to withstand heavy loads and moisture exposure.
- Older or Softer Vintage Masonry: If you are working with delicate or softer stones, such as older historical masonry or certain types of reclaimed brick, you need the softest touch. Use a lower-strength, highly flexible Type O mortar. This ensures the mortar can absorb movement and moisture without damaging the fragile units.
Horizon Stone Pro Tip: Always evaluate your stone’s softness and the structural demands of its location. A mortar that’s too strong for your stone will eventually cause irreversible damage, defeating the purpose of your beautiful installation.
Tip #3: Choosing a Mortar Color that Complements Your Stone
Now for the fun part: design. Your ultimate goal here is to choose a mortar color that either blends harmoniously with the stone for a seamless look or contrasts with it to make a bold design statement. Mortar is the background, and its relationship to your stone is what defines the entire mood of the wall. Does your project have brick? Don’t worry. Check out our tips on how to mix brick and stone veneer.

- Blending for Cohesion: To achieve a softer, more rustic, or contemporary look, choose a mortar color that closely matches the mid-tone or dominant shade of your Horizon Stone. When the colors align, the mortar visually recedes, creating a unified, textured wall mass where the focus is purely on the stone’s texture.
- Contrasting for Definition: To make the pattern and shape of every individual stone unit “pop,” select a color that is significantly lighter or darker than the stone. For example, a crisp, off-white mortar used with a dark stone creates a distinct, graphic outline that is perfect for formal or striking modern designs.
- Accenting Features: Don’t forget how mortar can draw attention to other features. If you have an important design element—like an archway, a decorative border, or specific corner pieces—you can use a very slightly different mortar color or tooling style on the joints of those pieces to subtly accent them and add a layer of custom detail to the facade.
Horizon Stone Pro Tip: A beautiful color choice can be ruined by an inconsistent mix. Mortar is sensitive to water, sand, and pigment levels, so make sure your installation team uses precise, repeatable measuring techniques for each batch. This consistency is the final step to ensuring a flawless, uniform color across your entire wall.
Tip #4: Test and Adjust with a Mock-Up
Choosing a mortar color from a tiny color chip or a dry bag is the easiest way to end up disappointed. Why? Because the final look is a chemical reaction—it’s influenced by the sand, the water, and even the air on the day it’s mixed. You can’t trust a sample!
- Create Your Test Sections: Before our installation team touches the main wall, they’ll create a small mock-up section (a few square feet) using your actual Horizon Stone veneer and the exact mortar mix. This is your chance to truly preview how the chosen mortar color and technique will look on your stone and under real-world conditions.
- Factor in Time and Weathering: Mortar always cures lighter than it looks when wet, so don’t approve the mock-up until it has completely dried—this can take days! If you are repointing an older wall, remember that the existing mortar is already faded and weathered. You’ll likely need to choose a slightly lighter color than the target to match that aged, existing appearance.
- The Final Check: Once cured, observe the test section throughout the day. See how the color shifts under the bright midday sun versus the soft evening shadows. This observation is your final opportunity to adjust the pigment-to-sand ratio before committing to the complete installation.
Horizon Stone Pro Tip: The mock-up isn’t an extra step; it’s the only way to guarantee you’ll love the final result. Take the time to build it, cure it, and observe it before giving the final go-ahead.


Tip #5: Protect the Finish: Curing and Cleaning are Crucial
The work isn’t finished when the last stone is set. The final, permanent look of your mortar’s ultimate color and strength is determined in the days and weeks after installation as it cures. This stage requires vigilance to protect your investment.
- Avoid Rain, Extreme Temperatures, and Direct Sunlight: Mortar color is vulnerable when curing. To ensure the color you approved on your mock-up stays true, take steps to shield the wall from rain, extreme heat, or direct, harsh sunlight for the first few days. We know that rapid or uneven drying can cause significant and permanent color variations.
- Clean with Extreme Care: After the mortar has cured, any remaining haze or splatters on the stone must be cleaned off. Our team always uses a gentle, non-acidic cleaning method. Using strong, acid-based cleaners (common in construction) can “burn” the fresh mortar surface, permanently bleaching, damaging, or changing the color you worked so hard to achieve. Visit our guide on how to clean stone veneer for more tips.
- Seal your Veneer: Ask your installer if the climate and exposure to the elements of your project will require sealing.
Horizon Stone Pro Tip: Don’t let your perfect installation be ruined at the finish line. We follow precise curing and cleaning protocols to ensure your mortar color stays true and your stone remains pristine for decades.
Final Steps to a Perfect Mortar Finish
Choosing your mortar is the defining moment for your stone project. To guarantee success, focus on the essentials: use Type N mortar for most stone veneers, insist on consistency in the mix, and always build a mock-up section. Follow these expert tips and you’ll be ready to use mortar as the powerful design tool it is!
Ready to find the perfect mortar and stone combination for your home project? Contact us today to consult with a Horizon Stone expert about your specific mortar questions, or find a distributor near you to start planning your installation.
FAQ:
Q: What type of mortar is best for stone veneer?
A: Type N is the best choice for most exterior and interior stone projects. It is both strong and flexible for indoor or outdoor projects. For foundations and retaining walls, a stronger mortar is needed like Type S or M.
Q: How much does mortar color affect the final look?
A: Mortar makes up to 20% of the visible wall surface, so its color contributes significantly to the final look. Matching mortar to the stone color creates a seamless, natural appearance. Contrasting mortar defines each stone and adds visual interest.